The Problem
How can I have a WordPress in my multiuser localhost development Linux (Mint 17) box send out (registration) email as me?
The Background
I have a development box with Linux Mint 17 Qiana installed. The box is configured to host multiple users. Each user can serve up web content from his/her own home directory. (In Apache lingo, mod_userdir module is enabled.)
In this box, I have WordPress set up in my home directory. I want this WordPress to be able to send out email. I don’t want these emails to be sent out as a generic system user. Instead, they should be sent out using my name and my email address. At the same time, and understandably, I don’t want other users to use my email account. So, the configuration needs to be local to my home directory and not global for everyone on the box.
The Problem Breakdown
The first problem I face is that the Linux box does not have a mail server configured. So, no one and nothing would be sending any email out. I would need to tackle this issue first.
Assuming that I get the first problem taken care of, I can see that the second problem would be in getting PHP to send email from the web directory. I need to make sure that any PHP scripts running from my web directory can send mail. More importantly, it needs to be able to, by default, send mail using my email account.
Finally, and it is ultimately what I want, is making sure that WordPress can send out registration email from my web site with my email account. If I tackle the first 2 problems properly, this may simply be a matter of testing WordPress registration process.
In short, there are 3 steps I need to take to get what I want:
- First, solve the problem of being able to send email from my account on localhost,
- Second, get PHP to send email from my virtual web host on localhost,
- Lastly, get WordPress (which uses PHP) to send email from my account on localhost.
The Solution
Enabling Email from my account on Linux Mint 17 localhost
There are many ways to enable email on Linux Mint. Some involve setting up a mail daemon. Others involve installing a mail client to connect to a remote SMTP host. While there are still some involving setting up a transfer agent to forward email message to external mail server to email handling.
Since this is a development box, I don’t want to configure a server to satisfy my measly number of mail requests round the clock. Not to mention all the headaches that come with setting up a mail server.
Also, I prefer to check my email on the web, so I don’t want a fancy mail client on my Linux box.
So, I opted for configuring a mail transfer agent and relying on external mail server to handle my mail requests.
Now that I have decided on how I want my mail requests to be handled, it is quite clear what steps I need to take. Before I start, I need to make sure that all the required packages are installed. Then, I need to configure the mail transfer agent. Once the transfer agent is configured, I need to make sure that my (lightweight) mail client can connect to the transfer agent. If these are all configured properly and the mail client is talking to the mail transfer agent, I should be able to run a test and see that emails are sending out from my email account to the destination.
There are different packages that I can use, and different ways to set this up. I have decided on using msmtp and mailutils. So, below is the outline of the packages that I need installing by the system administrator. Once these packages are installed, I can begin the configuration in my home directory.
Packages that system administrator needs installing:
msmtpca-certificatesmailutils
Configuration that I need setting up:
- Configure the mail transfer agent
- Configure the mail client
- Test to make sure that the transfer agent and the mail client can talk to each other
Installing Packages
To set up a transfer agent requires the use of msmtp. To send out email through the transfer agent to an external mail server requires the use of a mail client. Since I have access to a superuser account, I could just go ahead and and install these packages. (If you do not have admin right, please contact the machine’s administrator for assistance.)
To install the msmtp (and the corresponding certification authority’s certificates) and a light weigh mail client, mailutils, I did the following:
 ## Installing msmtp  and mailutils
 [506][vrw.myrna: /home/vrw] $ sudo apt-get install msmtp ca-certificates mailutils
Once the transfer agent msmtp, and the mail client, are installed, the rest can be configured locally within the user directory. In other words, no admin privileges required.
Now that I have the packages installed, I can focus on setting up my account:
- Set up configuration for a mail transfer agent (
msmtp) - Configure the mail client to use the mail transfer agent to send out email
- Test and verify the configurations
Configuring msmtp
To configure msmtp, I switched back to my own account and headed back to my own user directory. In the home directory, I created a file called .msmtprc.
 ## Changing directory to user home directory
 [508][vrw.myrna: /home/vrw] $ cd

 ## Use an editor that you are comfortable and create a file called .msmtprc
 [509][vrw.myrna: /home/vrw] $ gedit ~/.msmtprc
I set up my .msmtprc looking something similar to below. You can also find a more elaborate configuration at MSMTP.
# Section 1: Set default values for all following accounts.
defaults
auth login
tls on
tls_trust_file /etc/ssl/certs/ca-certificates.crt
logfile <logfile>

# Section 2: Set up connectivity and login credentials for Gmail
account gmail
host smtp.gmail.com
port 587
from <email@gmail.com>
user <email@gmail.com>
password <password for email@gmail.com>

# Section 3: Set a default account to use
account default : gmail
Section 1 specifies the defaults for all email accounts. By default, unless otherwise specified, msmtp will apply these parameters to all accounts.
| Config Parameter | What It Means |
|---|---|
| auth login: | Use 'LOGIN' authentication, a non-standard clear-text method. |
| tls on: | Send a TLS (Transport Layer Security) client certificate. |
| tls_trust_file /etc/ssl/certs/ca-certificates.crt: | Activates server certificate verification using the certificates in the file /etc/ssl/certs/ca-certificates.crt. |
| logfile <logfile>: | Logs errors, warnings, and status to <logfile>. You should substitute with the path and name of where you would like your msmtp log file to be. |
Section 2 specifies the connectivity parameters and login credentials for the email account.
| Config Parameter | What It Means |
|---|---|
| account: | The name of the email account. I call it gmail since it is for my gmail account. Feel free to rename this. |
| host: | The SMTP host for the email account you wish to connect to. Since I am using gmail, this is smtp.gmail.com. |
| port: | The SMTP port fo the email account you wish to connect to. Since I am using gmail, this is 587 for TLS. |
| from: | The from address on the email. I used my gmail email address. You should substitute this with your email address. |
| user: | The login ID used for authentication with the SMTP server. Since I am using gmail, the login ID is my email address. You should substitute this with your own login to your email service provider. This is usually the same as your email address. |
| password: | The login password to the SMTP server. Since I am using gmail, this password would be the password I use to check my email in gmail. You should substitute this with your own passowrd to your email account. |
Section 3 specifics which account msmtp would use as the default email account.
| Config Parameter | What It Means |
|---|---|
| account default: | Specifies the email account to use if none is specified. Since I have only configured one account, I set the default to use that account. You should substitute this name with the one you have defined in Section 2, under field account. |
If you use gmail and use Google 2-step verification, like me, you would need to do a bit more in order to fill in the password field in the configuration file.
In order for me to fill in the password for gmail in the msmtp configuration file, I need to set up Gmail apps password. Setting that up is relatively straight forward.
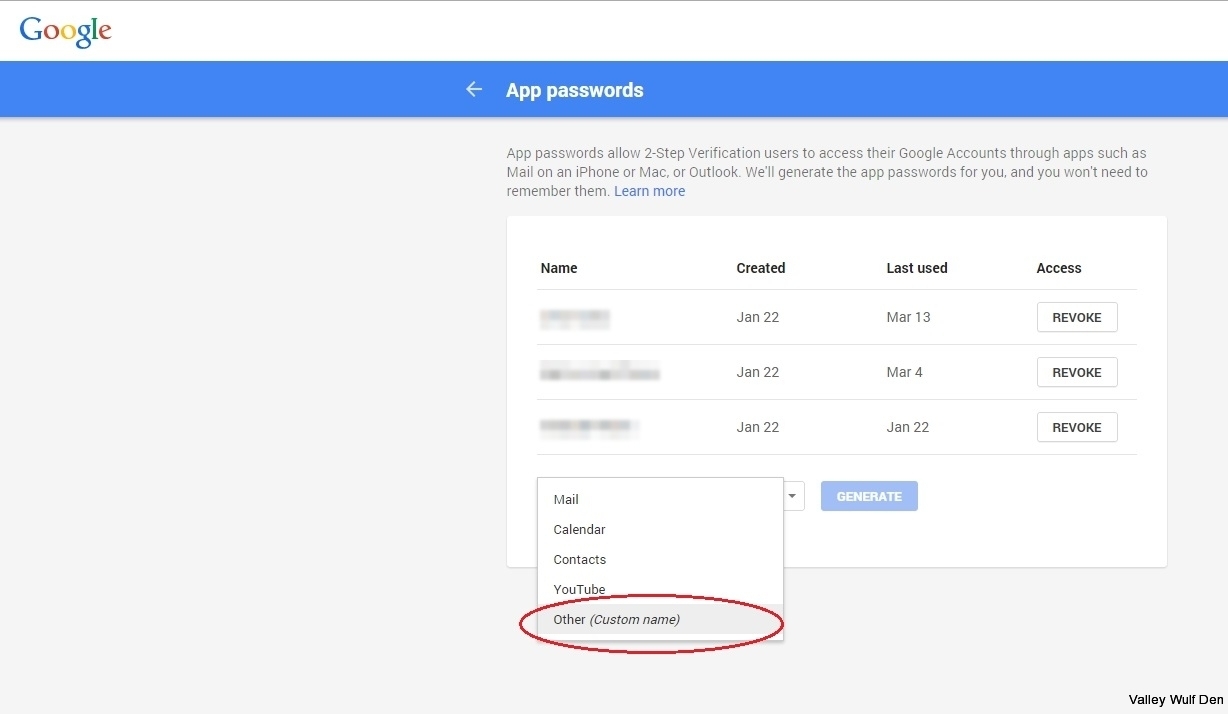
I first went to the Google App passwords site, and logged into my gmail account.
Then, I selected “Other (custom name)” from the dropdown menu at the bottom of the screen.
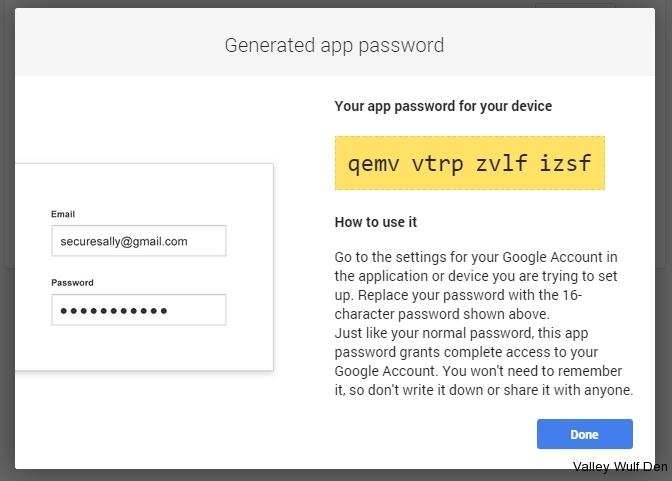
I gave it a label of my choosing, Valley Wulf Private WordPress, and hit the “Generate” button. Google would then generate a password for the application.
I noted the 16-character password and entered this into my .msmtprc file.
Since this is an app password, I can reset it each time I am done doing my WordPress test. (To do so, I simply have to go back to the Google App passwords site, look for the label, Valley Wulf Private WordPress, and click on the “Revoke” button. When I am ready to use my Linux to send out mail again, I simply go back to Google App passwords page and generate another password. I can then put the new app apssword into my ./msmtprc and off I go again.)
If you don’t like revoking your application password after each use, you can also encrypt the password in your ./msmtprc file using passwordeval instead of password. To read more about this, please refer to the manual at MSMTP.
If you use gmail and wants to see more details on gmail SMTP settings and restrictions, please refer to Google’s documentation.
For more details about gmail app passwords, please see Google’s documentation on 2-Step Verification, Sign in using App Passwords.
Now that I had the ~/.msmtprc configured, I saved the file and checked on the file permission.
In order for the msmtp to read the configuration, the configuration file needs to be readable and writeable to its owner only.
To check the file permission, I did “ls -lart ~/.msmtprc“.
 ## Checking file permission
 [518][vrw.myrna: /home/vrw] $ ls -lart ~/.msmtprc
 -rw-r--r-- 1 vrw vrw 469 Jan 27 15:58 /home/vrw/.msmtprc
Well, the file permission was not set correctly by default. I needed to use use chmod to update the file permission.
 ## Updating file permission for .msmtprc
 [519][vrw.myrna: /home/vrw] $ chmod 600 ~/.msmtprc

 ## Checking file permission
 [520][vrw.myrna: /home/vrw] $ ls -lart ~/.msmtprc
 -rw------- 1 vrw vrw 469 Jan 27 15:58 /home/vrw/.msmtprc
Now that the configuration for msmtp is set up, I am ready to configure a mail client.
Configuring (Send)mail
Since I ever only going to use the mail utility to test the WordPress user registration workflow, I don’t need a fancy email client. So, the basic text based email client, mail, would suffice.
Similar to msmtp, I need to create a local configuration file for mail. The configuration file will tell mail where to find the mail server and provide it with any parameters it requires to properly connect to the mail server.
To begin configuring mail, I headed to my home directory and created a file called .mailrc.
 ## Changing directory to user home directory
 [551][vrw.myrna: /home/vrw] $ cd

 ## Use an editor that you are comfortable and create a file called .msmtprc
 [552][vrw.myrna: /home/vrw] $ gedit ~/.mailrc
In the ~/.mailrc file, I put in the following:
## Set up smtp for mail
set sendmail="/usr/bin/msmtp -t"
set message-sendmail-extra-arguments="-a gmail"
Let’s take a look at what these few lines mean.
The “set sendmail=” lets mail know what program it should use to send out email. In this case, it should use msmtp with the “-t” argument. .mailrc needs to provide the full path to msmtp. Otherwise, mail will not be able to locate the program. In this case, we can see that msmtp is located in /usr/bin/msmtp. The “-t” argument just makes sure that msmtp takes a recipient list.
The “set message-sendmail-extra-arguments=” provides any additional arguments with which mail should call msmtp with. As seen from this configuration, mail will make sure that msmtp will send email out using the account set up for account gmail. gmail was the account that I had previously configured in ~/.msmtprc.
There are other customization that one can do to control how mail sends out email. If you wish to customize more, please check out an overview of the .mailrc format by IBM.
Now, I have both the transfer agent configured and a light weigh mail client configured, I am ready for the test!
Test and Verify Sending Email from User Directory
The moment has come to see if I can indeed send email out from my account in localhost.
Before I can send any email out, I need to first prepare a message as the email body.
 ## Creating an email message
 [560][vrw.myrna: /home/vrw] $ echo -e "A testing email sent from the command line!" > /tmp/vrw_test_email
Now that I have a message, let me send it out and see would what happens!
 ## Sending an email from command line
 [566][vrw.myrna: /home/vrw] $  mail -s "Email Test" <your_email_here@somewhere.com> < /tmp/vrw_test_email
Remember the log file I have configured in .msmtprc earlier? (Make sure that you put that in a place where you have write permission to.) I can look at the log file and see if the message has been successfully sent through.
Well, things looked pretty good. I then checked my gmail inbox. The message that I have sent via the command line had arrived successfully. More importantly, the email “From” field was the account I had set up. Just what I had wanted!
Before moving on, I want to mention that Klenwell Information Services has a very nice shell script that allows you to set all of these up in one fell swoop. You can check it out at Klenwll Open Source Repository. As with any executable, do double check how it might impact your system before running it.
Sending Email via PHP from my Virtual Host
Now that I have enabled the ability to send email from my account, I am ready to tackle the next step. The next step is to make sure that I can send email from my virtual (web) host using PHP.
This boils down to getting the respective Apache PHP module for my virtual (web) host to use the configuration I have previously set up for sending email. I can see the following 3 steps required to accomplish this:
- Put my configuration in a location where Apache can see them,
- Configure the respective Apache PHP module to read these configurations to send mail,
- Test and verify sending email from my local virtual (web) host.
Moving Over Configuration for Apache
Since Apache would not be able to access my home directory, I need to put my configurations for the transfer agent and mail client where Apache can see them. The logical choice would be the DocumentRoot for my virtaul host. To confirm this, I looked for the DocumentRoot directive under my virtual host configuration file in /etc/apache2/sites-enabled/. The DocumentRoot for my virtual host is located in the public_html directory under my home directory.
Based on this, I copied over the .msmtprc file to the public_html directory.
 ## Changing directory to my virtual host's DocumentRoot directory
 [569][vrw.myrna: /home/vrw] $ cd ~/public_html

 ## Copy .msmtprc and .mailrc to the virtual host DocumentRoot directory
 [570][vrw.myrna: /home/vrw/public_html] $ cp -p ~/.msmtprc .
I made adjustments to the configurations to accommodate a new log file location. Beyond that, the configurations were pretty much the same.
Configuring suPHP
Now that the configuration file is in place, I need to configure the PHP module that Apache uses.
In the Linux environment I am using, Apache uses suPHP module to run php scripts in user directories with the directories’ owner permissions. So, the component that I need to configure would be mod_suPHP.
To configure mod_suPHP, I need to create a local php.ini file for my virtual host. To separate out the configuration file from all the other documents, I created a config directory under the DocumentRoot of my virtual host.
 ## Changing directory to my virtual host's DocumentRoot directory
 [573][vrw.myrna: /home/vrw] $ cd ~/public_html

 ## Create a config directory
 [574][vrw.myrna: /home/vrw/public_html] $ mkdir ~/public_html/config
I then created a local php.ini file in the config directory by copying the default php.ini file.
## Changing directory to my virtual host's DocumentRoot config directory
 [575][vrw.myrna: /home/vrw] $ cd ~/public_html/config

 ## Copying the default php.ini to the local directory
 [576][vrw.myrna: /home/vrw/public_html/config] $ cp -p /etc/php5/apache2/php.ini .

 ## Using an editor that you are comfortable with, create a local php.ini file for suPHP
 [577][vrw.myrna: /home/vrw/public_html/config] $ gedit php.ini
In the php.ini file, I customized the section under [mail function].
To indicate which program to use to send email, I set the sendmail_path to /usr/bin/msmtp.
If you don’t know the path to your msmtp, you can type which msmtp to find out.
 ## Changing directory to my virtual host's DocumentRoot directory
 [579][vrw.myrna: /home/vrw] $ which msmtp
 /usr/bin/msmtp
To specify the file path to the configuration for msmtp, I made use of the -C parameter. I set it to the configuration file that is located in my virtual host’s DocumentRoot: /home/vrw/public_html/.msmtprc.
To make sure that msmtp would take a recipient list, I made use of the “-t” parameter.
; For Unix only. You may supply arguments as well (default: "sendmail -t -i").
; http://php.net/sendmail-path
sendmail_path = /usr/bin/msmtp -C /home/vrw/public_html/.msmtprc -t
To ensure that msmtp uses the gmail account I had configured in the .msmtprc file, I set the mail.force_extra_parameters to -a gmail.
; Force the addition of the specified parameters to be passed as extra parameters
; to the sendmail binary. These parameters will always replace the value of
; the 5th parameter to mail(), even in safe mode.
mail.force_extra_parameters = -a gmail
In addition, I configured a separate log file for mail.log so that I can more readily debug any issue that may come up from PHP.
; The path to a log file that will log all mail() calls. Log entries include
; the full path of the script, line number, To address and headers.
mail.log = /home/vrw/public_html/mail.log
After my editing, the section under [mail function] looked similar to below.
; For Unix only. You may supply arguments as well (default: "sendmail -t -i").
; http://php.net/sendmail-path
sendmail_path = /usr/bin/msmtp -C /home/vrw/public_html/.msmtprc -t

; Force the addition of the specified parameters to be passed as extra parameters
; to the sendmail binary. These parameters will always replace the value of
; the 5th parameter to mail(), even in safe mode.
mail.force_extra_parameters = -a gmail

; Add X-PHP-Originating-Script: that will include uid of the script followed by the filename
mail.add_x_header = On

; The path to a log file that will log all mail() calls. Log entries include
; the full path of the script, line number, To address and headers.
mail.log = /home/vrw/public_html/mail.log
At this point, without further instruction, Apache’s suPHP module would not have know where the local php.ini is located. To tell it where the local php.ini is located, I made use of Apache’s .htaccess file in my virtual host.
 ## Changing directory to my virtual host's DocumentRoot directory
 [580][vrw.myrna: /home/vrw] $ cd ~/public_html

 ## Using an editor you are comfortable with, edit the .htaccess file
 [581][vrw.myrna: /home/vrw/public_html] $ gedit .htaccess
In the .htaccess file, I added the following lines so that mod_suPHP would know where the local php.ini would be.
# PHP/PHP.INI HANDLER/CACHE CODE
<IfModule mod_suphp.c>
    suPHP_ConfigPath /home/vrw/public_html/config

    <Files php.ini>
        order allow,deny
        deny from all
    </Files>
</IfModule>
With this additional configuration in the .htaccess, mod_suPHP should now know to read in a local version of the php.ini file from /home/vrw/public_html/config/ directory.
Upon going over the php.ini file, mod_suPHP would then have the instructions on how to send out email based on the configuration as specified in the /home/vrw/public_html/.msmtprc file.
Now, all is left is testing the configurations to make sure everything ties together.
Test and Verify Sending Email using PHP from Virtual Host
With suPHP configured, I should be able to send mail from my virtual (web) host using a PHP script.
To test this, I headed to my virtual host DocumentRoot directoy and created a short PHP script.
 ## Changing directory to my virtual host's DocumentRoot directory
 [580][vrw.myrna: /home/vrw] $ cd ~/public_html

 ## Using an editor you are comfortable with, create a file called test_mail.php
 [581][vrw.myrna: /home/vrw/public_html] $ gedit test_mail.php
In the test_mail.php, I created a short email message:
<?php
mail("someone@somewhere.com","Hello World","Email sent using PHP via msmtp.");
?>
You would need to substitute someone@somewhere.com with your own email address.
Once the script is in place, I then launched a web browser and typed in my virtual host’s address and appended test_mail.php. (In my case, the address would read like, http://vrw.dev.mt/test_mail.php).
The page itself wasn’t much to look at. However, assuming that everything was configured properly, I would receive an email in my gmail inbox. Lucky for me, everything worked out! My gmail account successfully received an email from the PHP script. The email “From” field was as I had configured in my DocumentRoot directory.
Sending Registration Email from WordPress
Now that PHP has been configured to send out email from my virtual (web) host, all the ground work should be in place. If everything has been configured properly, this would merely be a Test and Verify.
So, to test this, I launched a web browser and keyed in my virtual host WordPress address. In my case, this would be http://vrw.dev.mt/mt_ss_t/. Without logging into my WordPress site, I hit the Register link at the home page and began to register myself as a new user.
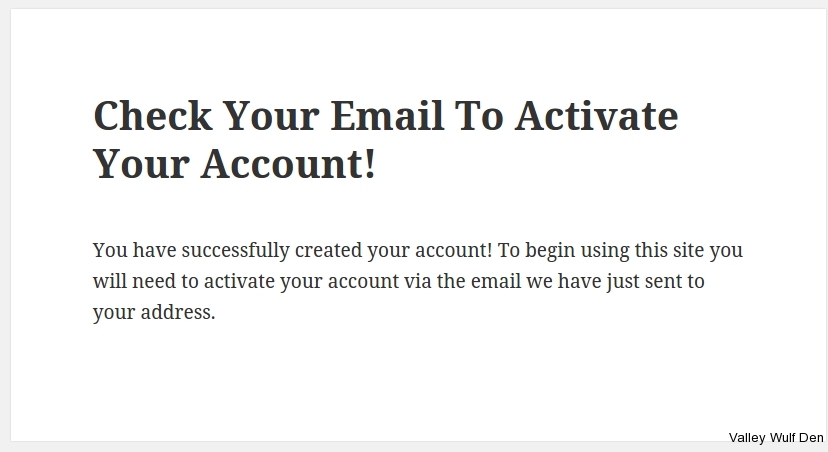
Upon successful registration, I was prompted by my WordPress to check my email for activation.
When I checked my gmail, I saw an email from my localhost WordPress site. It was sent from the sender account I had configured for my virtual host. The email thanked me for registering and provided me with a link to activate my account.
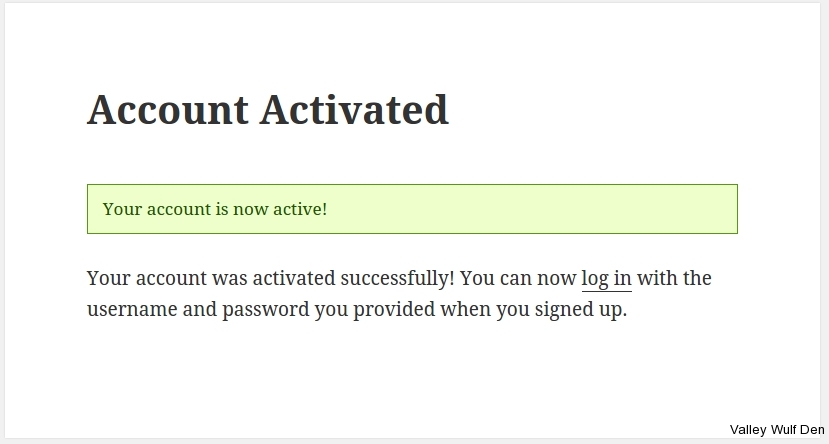
Upon clicking on the email, I was brought to a web browser, with my localhost WordPress notifying me that my account has been successfully activated.
For completeness sake, I also checked the log files used by PHP and the transfer agent. The log file from php.ini (/home/vrw/public_html/mail.log) showed me messages from PHPMailer. The log file from .msmtprc showed me log messages from the transfer agent. Both indicated that email had been successfully sent out!
Reference
- MSMTP Manual (http://msmtp.sourceforge.net/doc/msmtp.html)
- Google documentation on SMTP settings (https://support.google.com/a/answer/176600?hl=en)
- IBM Knowledge Center on .mailrc File Format (http://www-01.ibm.com/support/knowledgecenter/ssw_aix_61/com.ibm.aix.files/mailrc.htm)
- msmtp, by archlinux (https://wiki.archlinux.org/index.php/msmtp)
- Ask ubuntu: How to have my PHP Send mail? (http://askubuntu.com/questions/47609/how-to-have-my-php-send-mail)
- klenwll open source repository (https://code.google.com/p/klenwell/source/browse/trunk/projects/bash/mailx/setup_gmail_command_line.sh)
- MSMTP (http://msmtp.sourceforge.net/)
- suPHP and phpMyAdmin on Ubuntu 12.04 (http://www.sysadminworld.com/2012/suphp-and-phpmyadmin-on-ubuntu-12-04/)
- How to Get Your php.ini Path with SuPHP, by HostGator (http://support.hostgator.com/articles/specialized-help/technical/how-to-get-your-php-ini-path-with-suphp)


Looks good – keep up the good work.